Photo Profiles
Calm
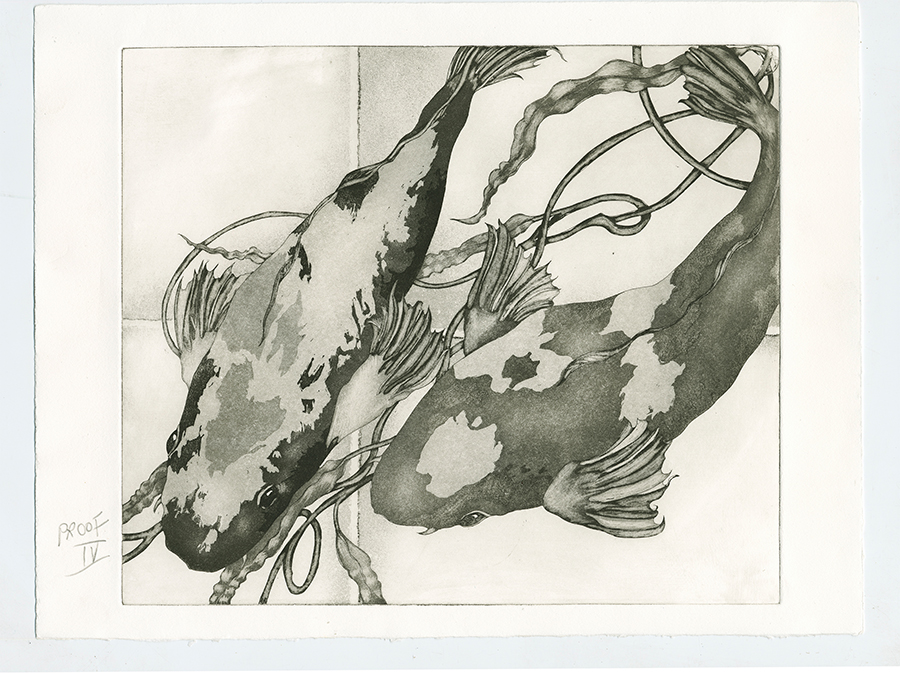
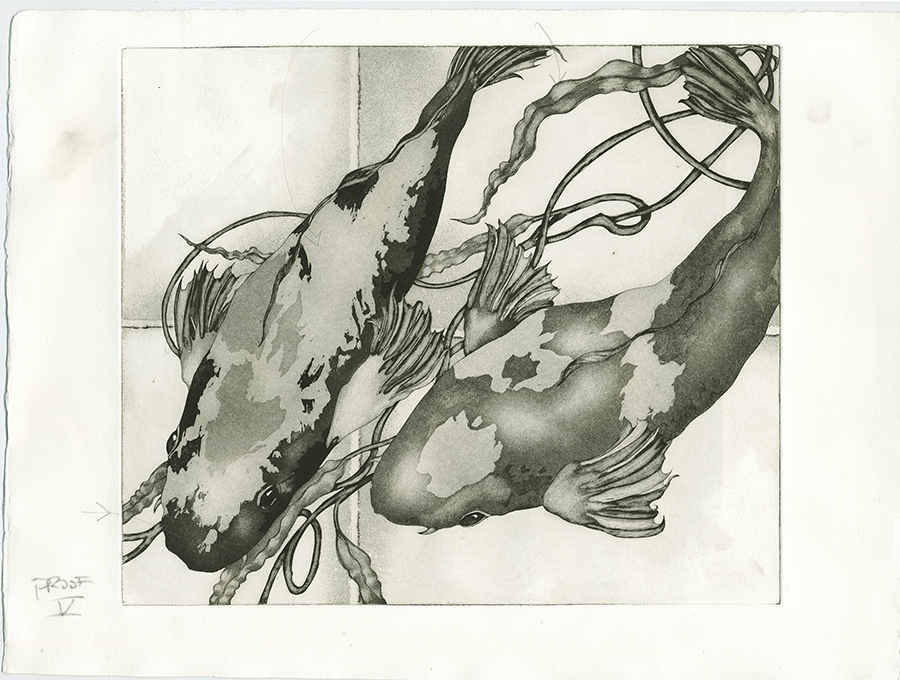
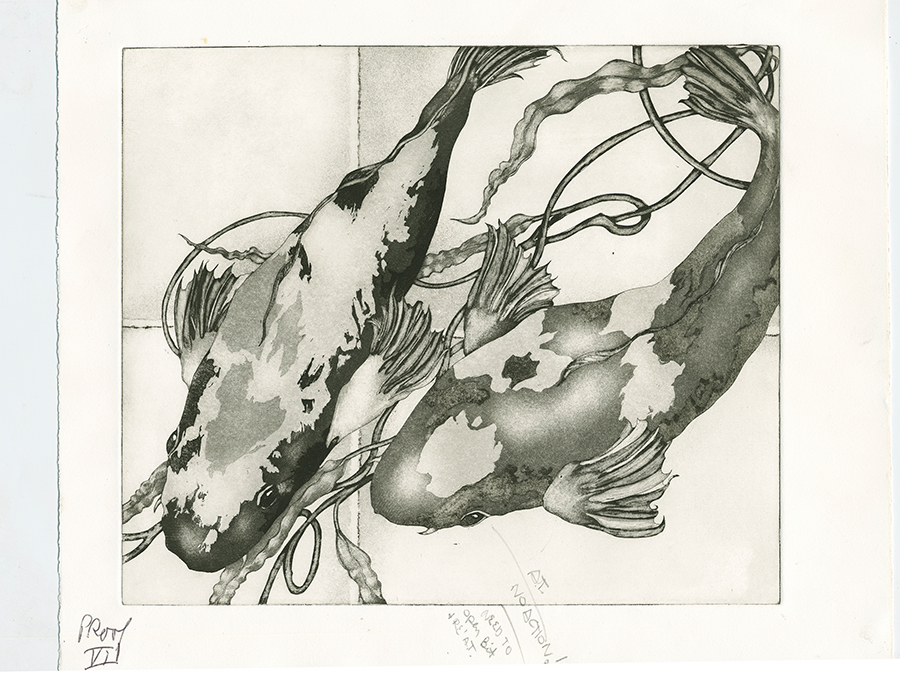
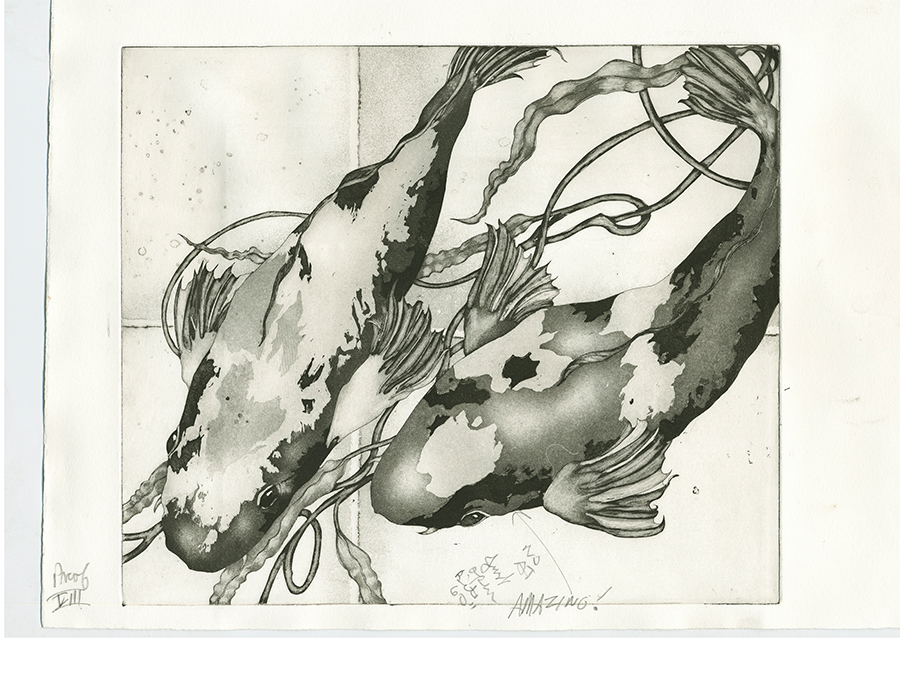
Enjoy this progression of the original print “CALM”
As you can see there are often many steps in the development process. Some steps are very tiny ones that you can hardly notice while other steps show a lot of progress. Each step is crucial for getting to the final proof. As you advance the slideshow you will be able to see how each step happens to get to the ultimate end result for a completed Etching.
It begins with the idea, which is usually a tracing (1st) image. This tracing is used to transfer to the coated copper plate, the image will be reversed on the plate. The next colorful proof is the first line proof after etching the line and also a value chart color coded to a percentage chart (from 10% to 100%). The next several proofs show the involved process of burnishing, scrapping, the addition of more line work (in the scales of the fish) and a background . As you can see from the first tracing to the completed etching, even the addition of a hand carved stamp is arbitrary until the final proof. To see a progression of this plate being printed go to islandinternational.com and select the Black Raven Press tab.
The completed etching is printed on 100% rag paper. A sheet of textured paper is sandwiched between the paper and the ink. Once the print is printed it is hand colored, gold leafed and stamped with the hand carved dragon fly stamp.
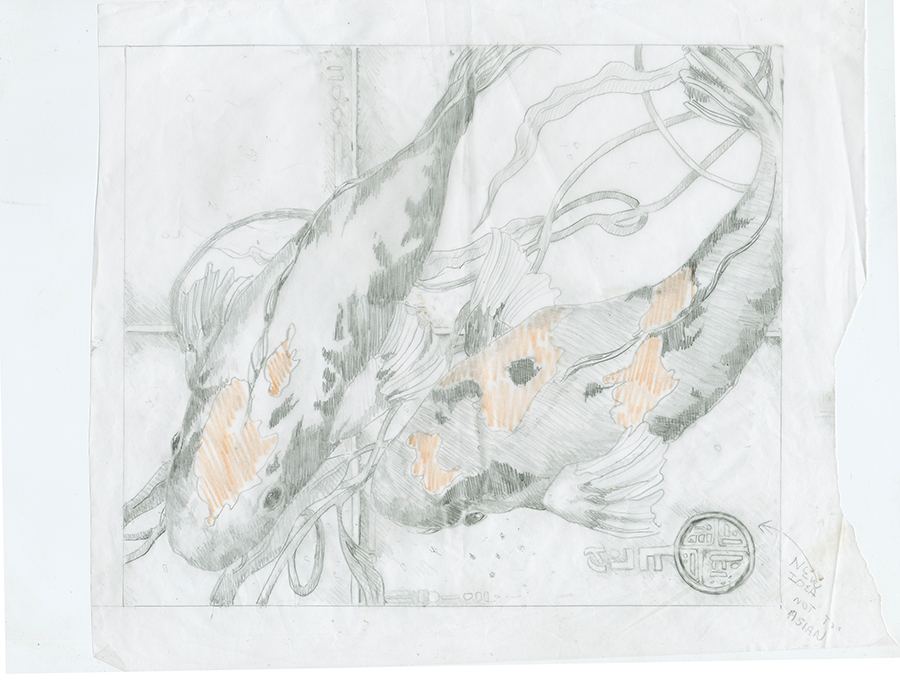
First tracing of the idea
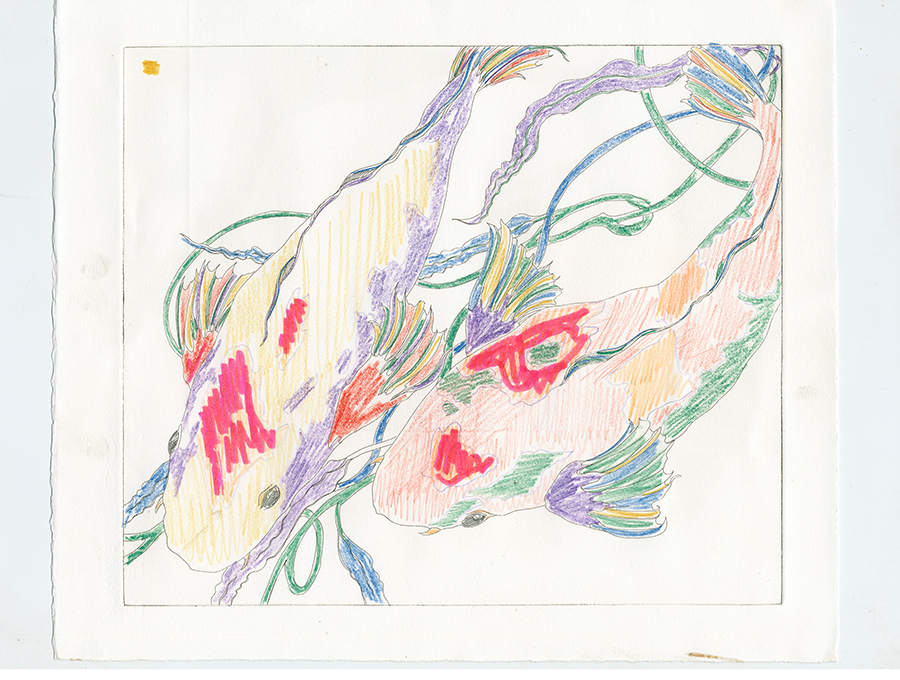
Value percentage chart for etching lights to dark
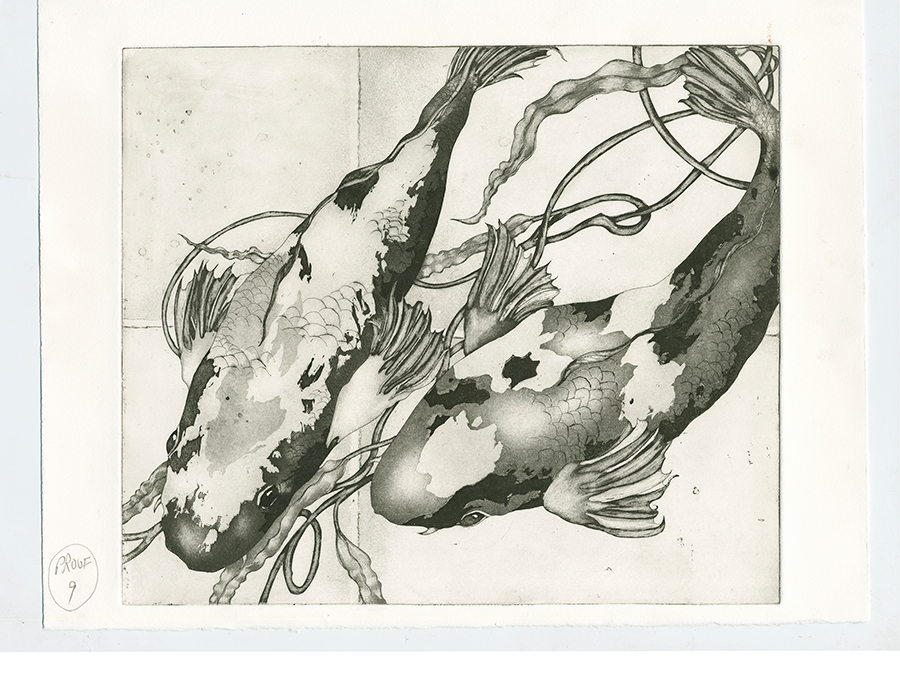
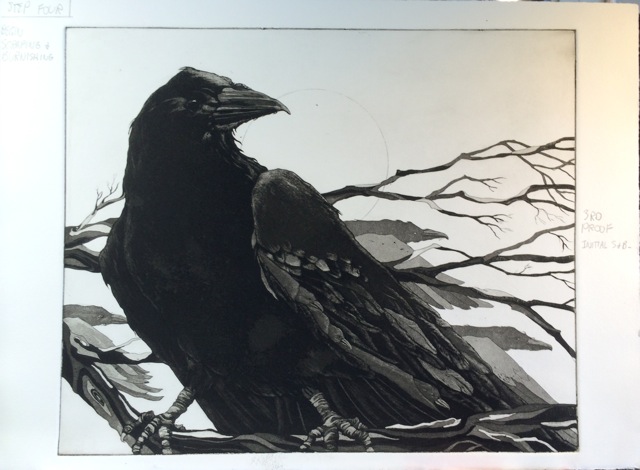
After Step biting the percentages, no scraping or burnishing at this point
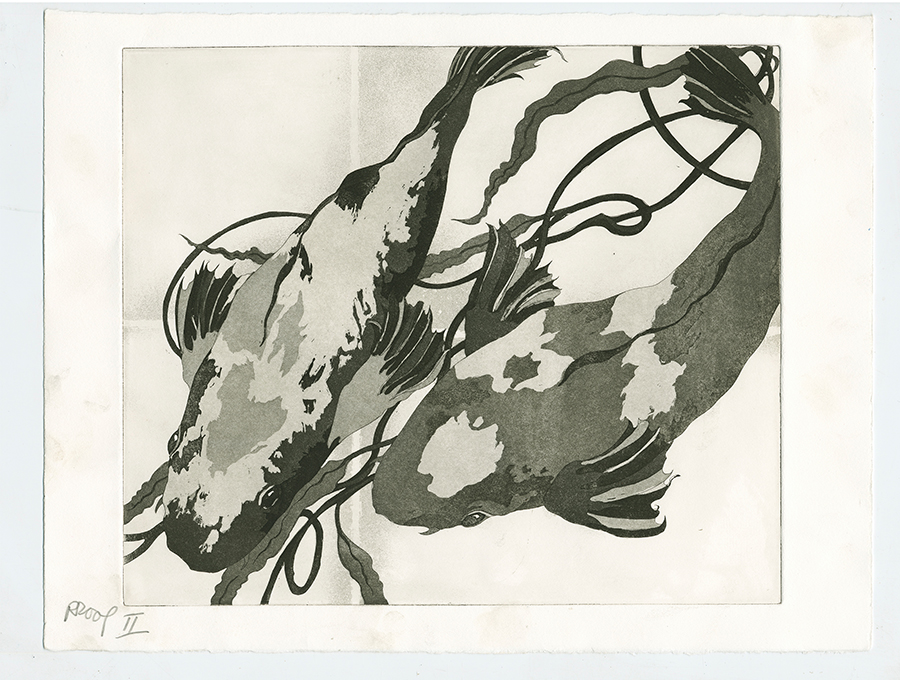
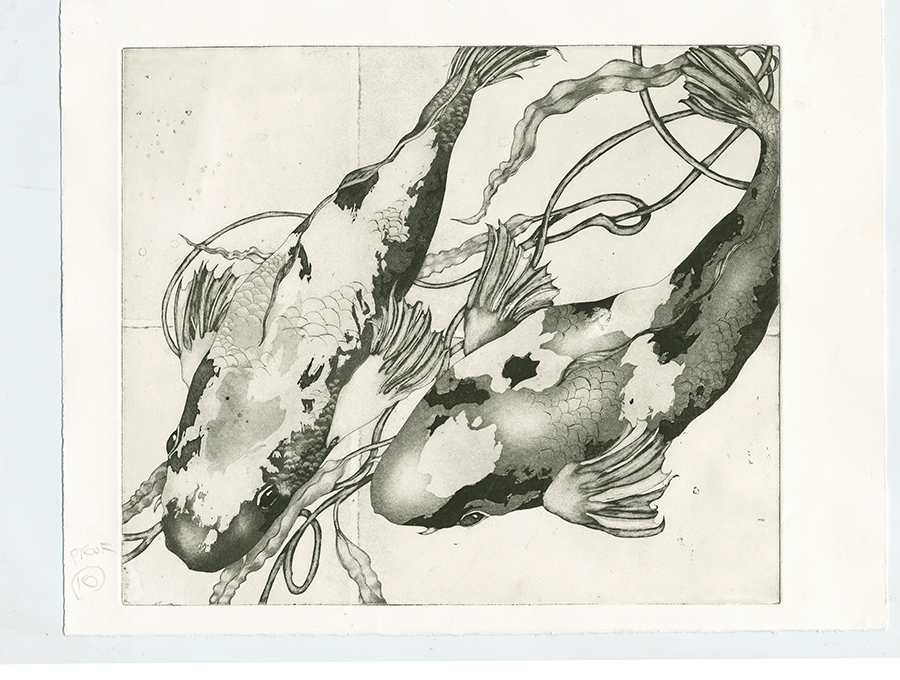
Beginning to scrap and burnish
You can see the progression of the scraping and burnishing in the next images
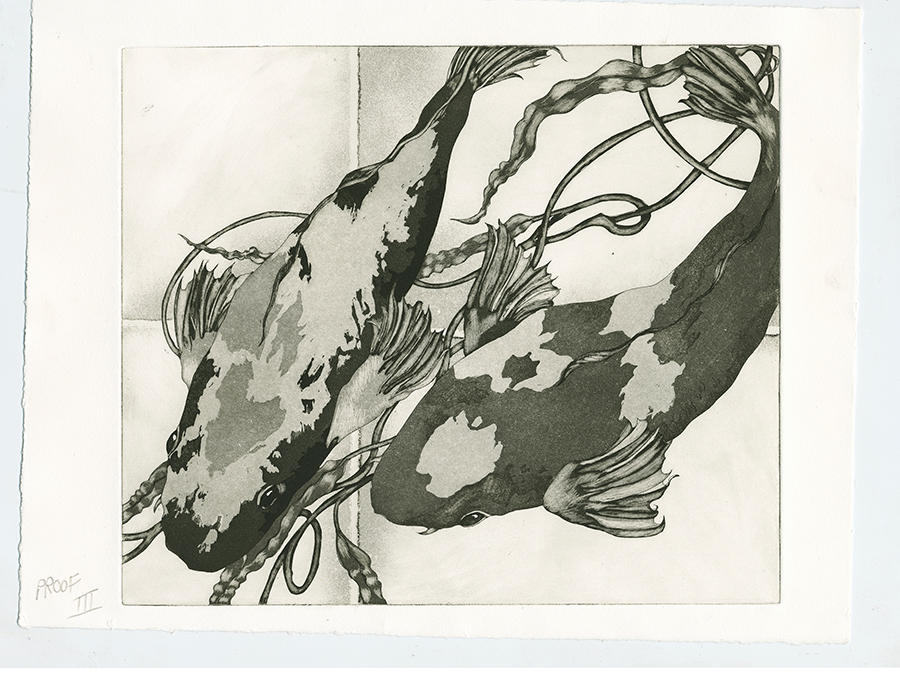
Addition of scales to the fish by line etching

Additional scraping and burnishing on fish
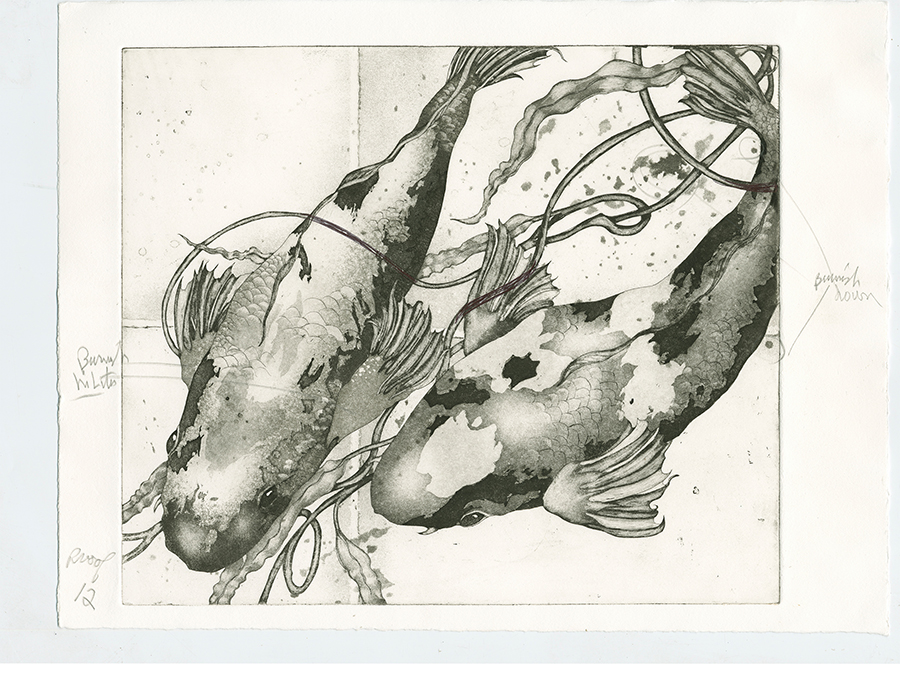
Background texture added

More background texture and testing hand carved stamp idea
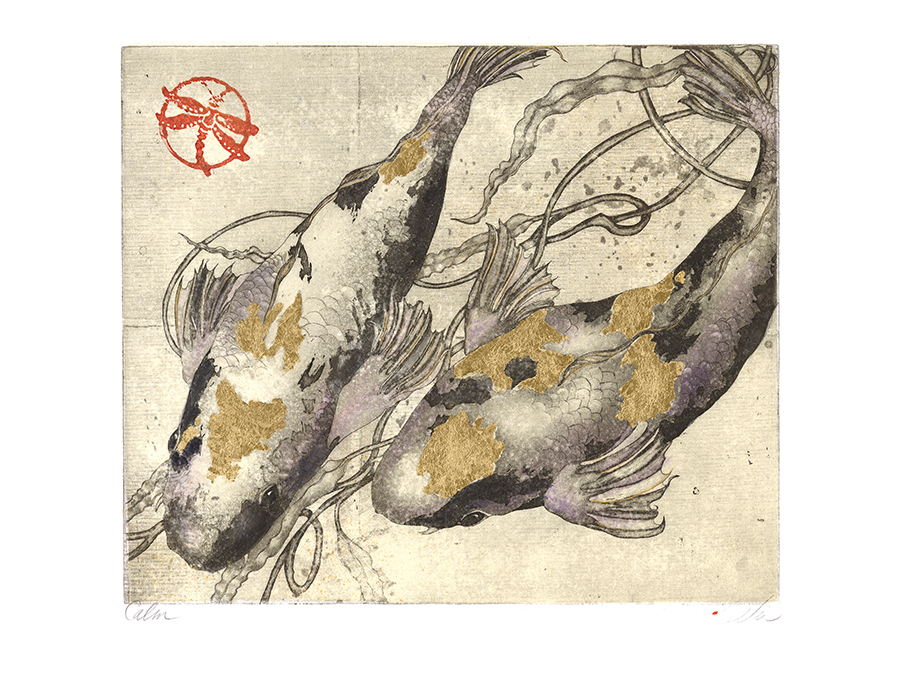
CALM the finished print
with dragon fly stamp, collage' paper, hand colored and gold leafed
Keeper of Light
…….. a hand colored original print (Etching) from conception to completion
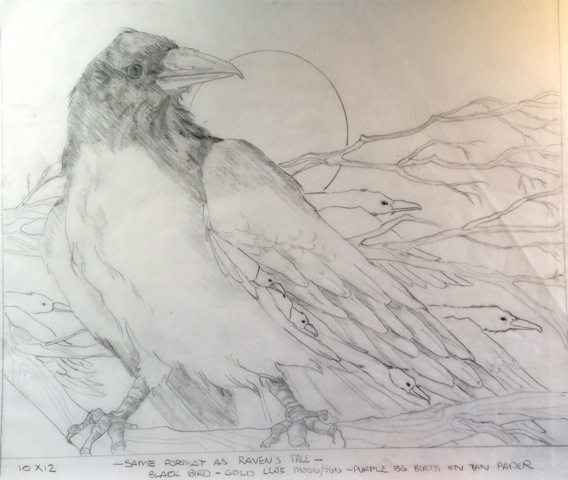
Step 1 Keeper of Light (the idea)
First tracing of the design for Keeper of Light
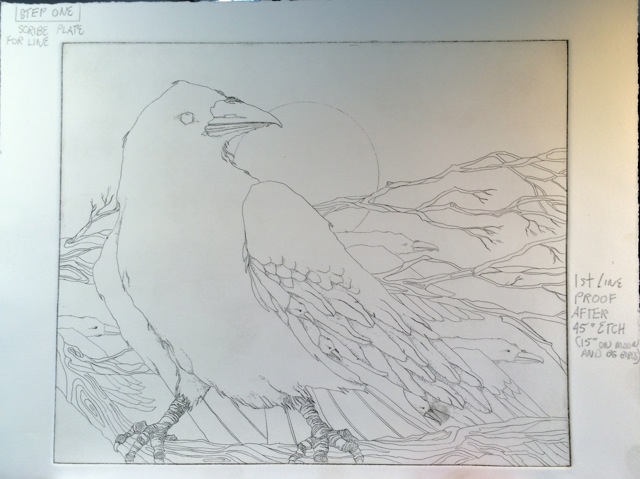
Step 2 Keeper of Light
1st line etch proof after etching in a bath of ferric chloride.
The metal plate is copper
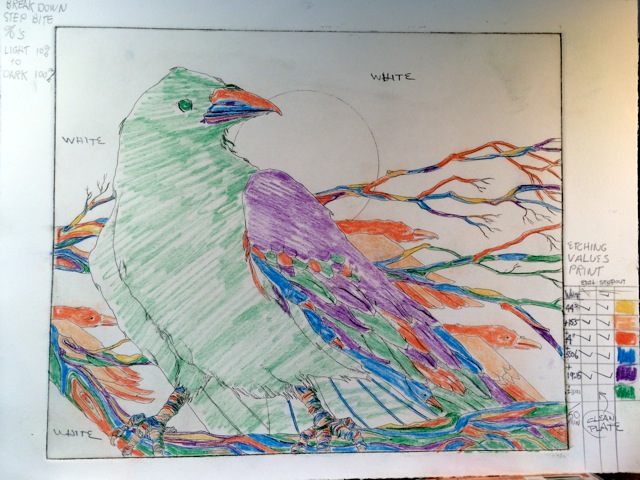
Step 3 Keeper of Light
Value breakdown for step biting etch from 10% (light) to 100% (dark)
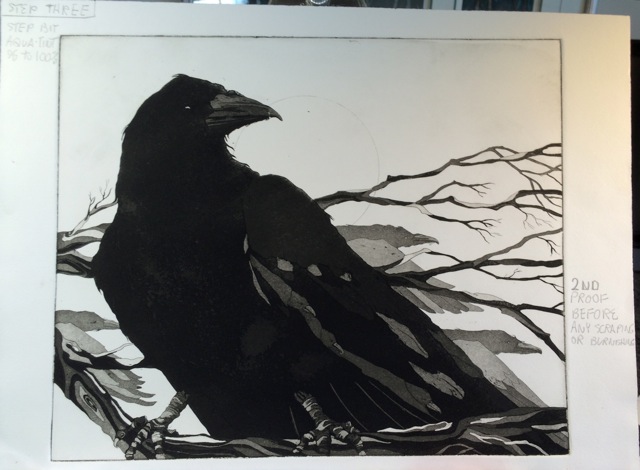
Step 4 Keeper of Light
Untouched value proof after all step biting is complete.
No scraping or burnishing at this point
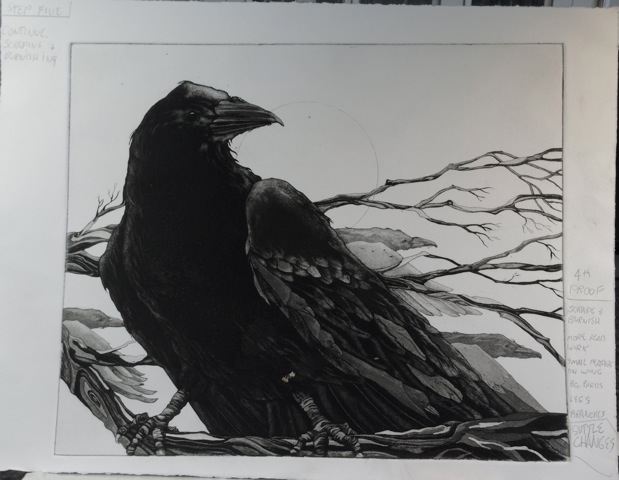
Step 5 Keeper of Light
Proof after beginning to burnish and scrap plate for highlights
on the body of the raven
Step 6 Keeper of Light
Final burnishing and scraping on plate of limb and background birds
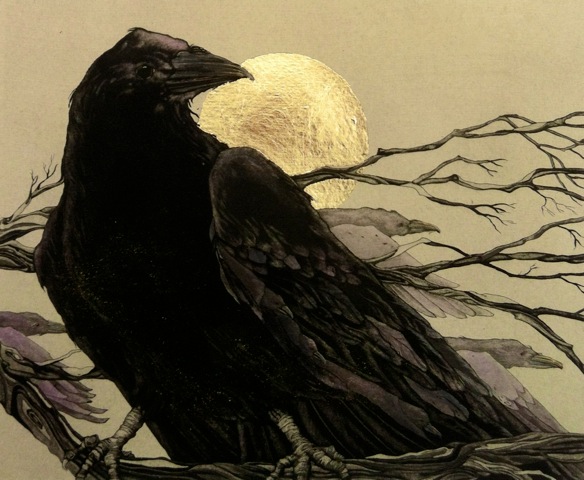
Keeper of Light 10” x 12"
Finished print, hand colored with background paper and gold leaf
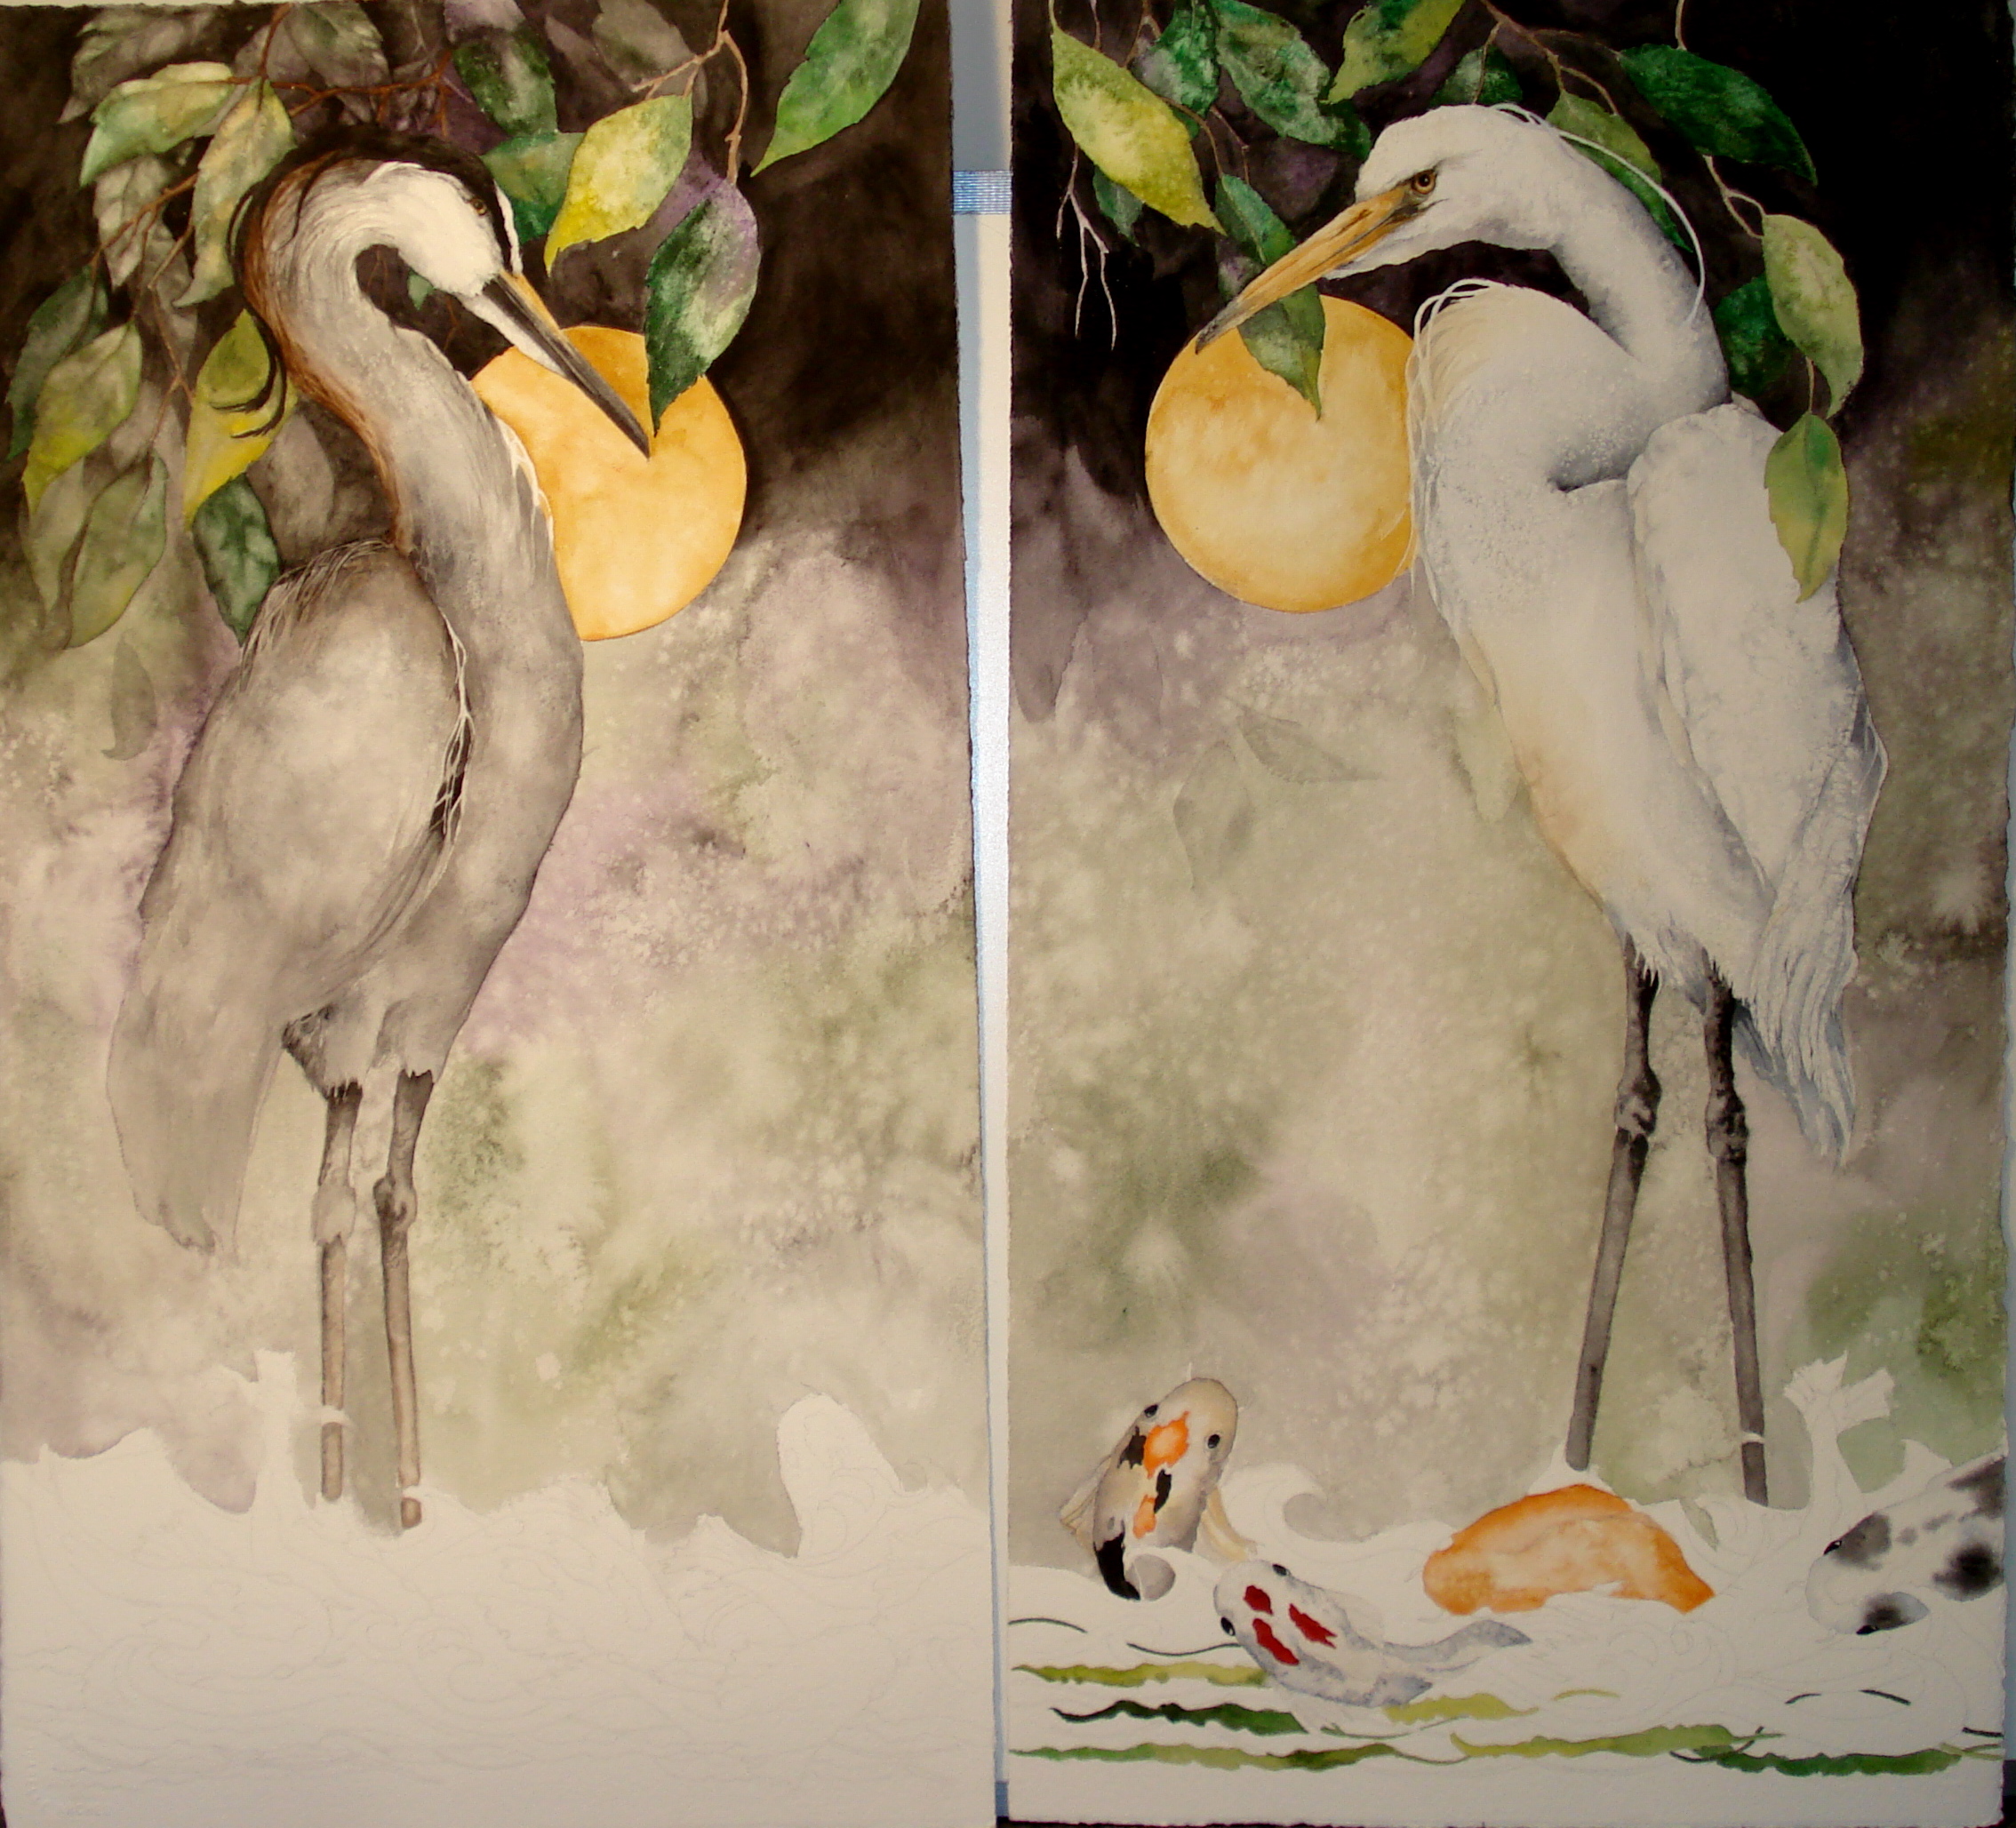
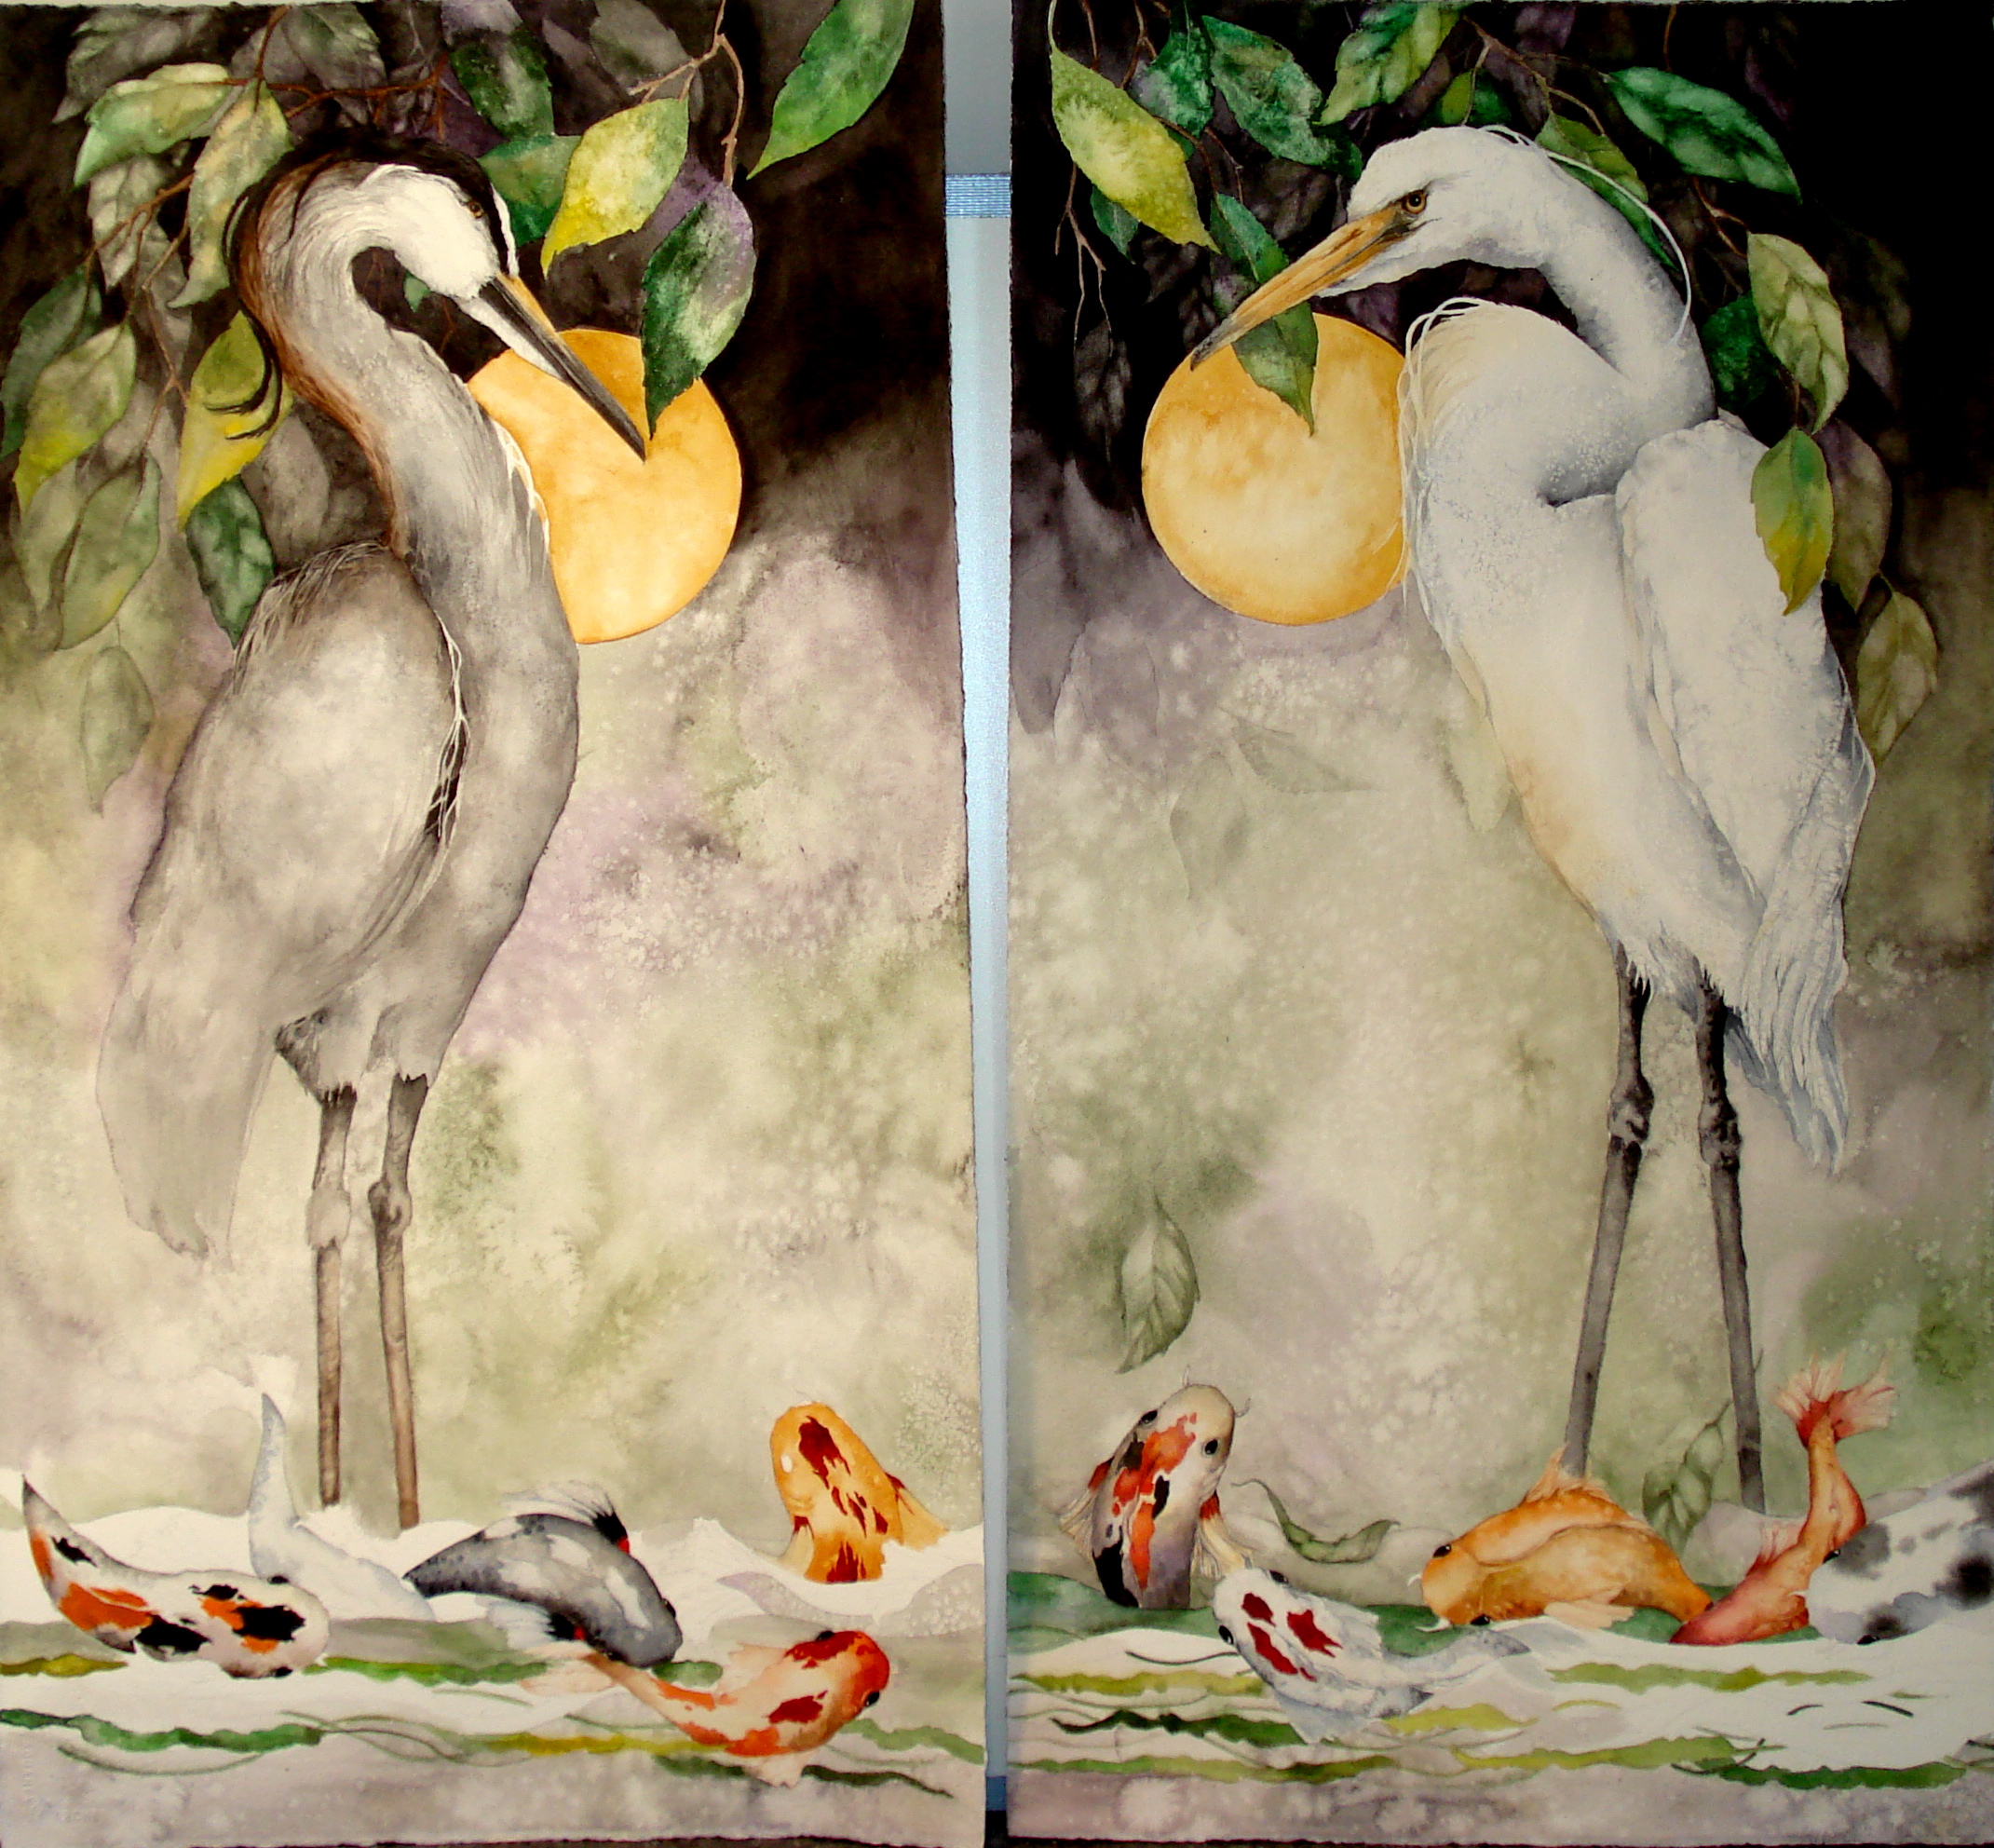
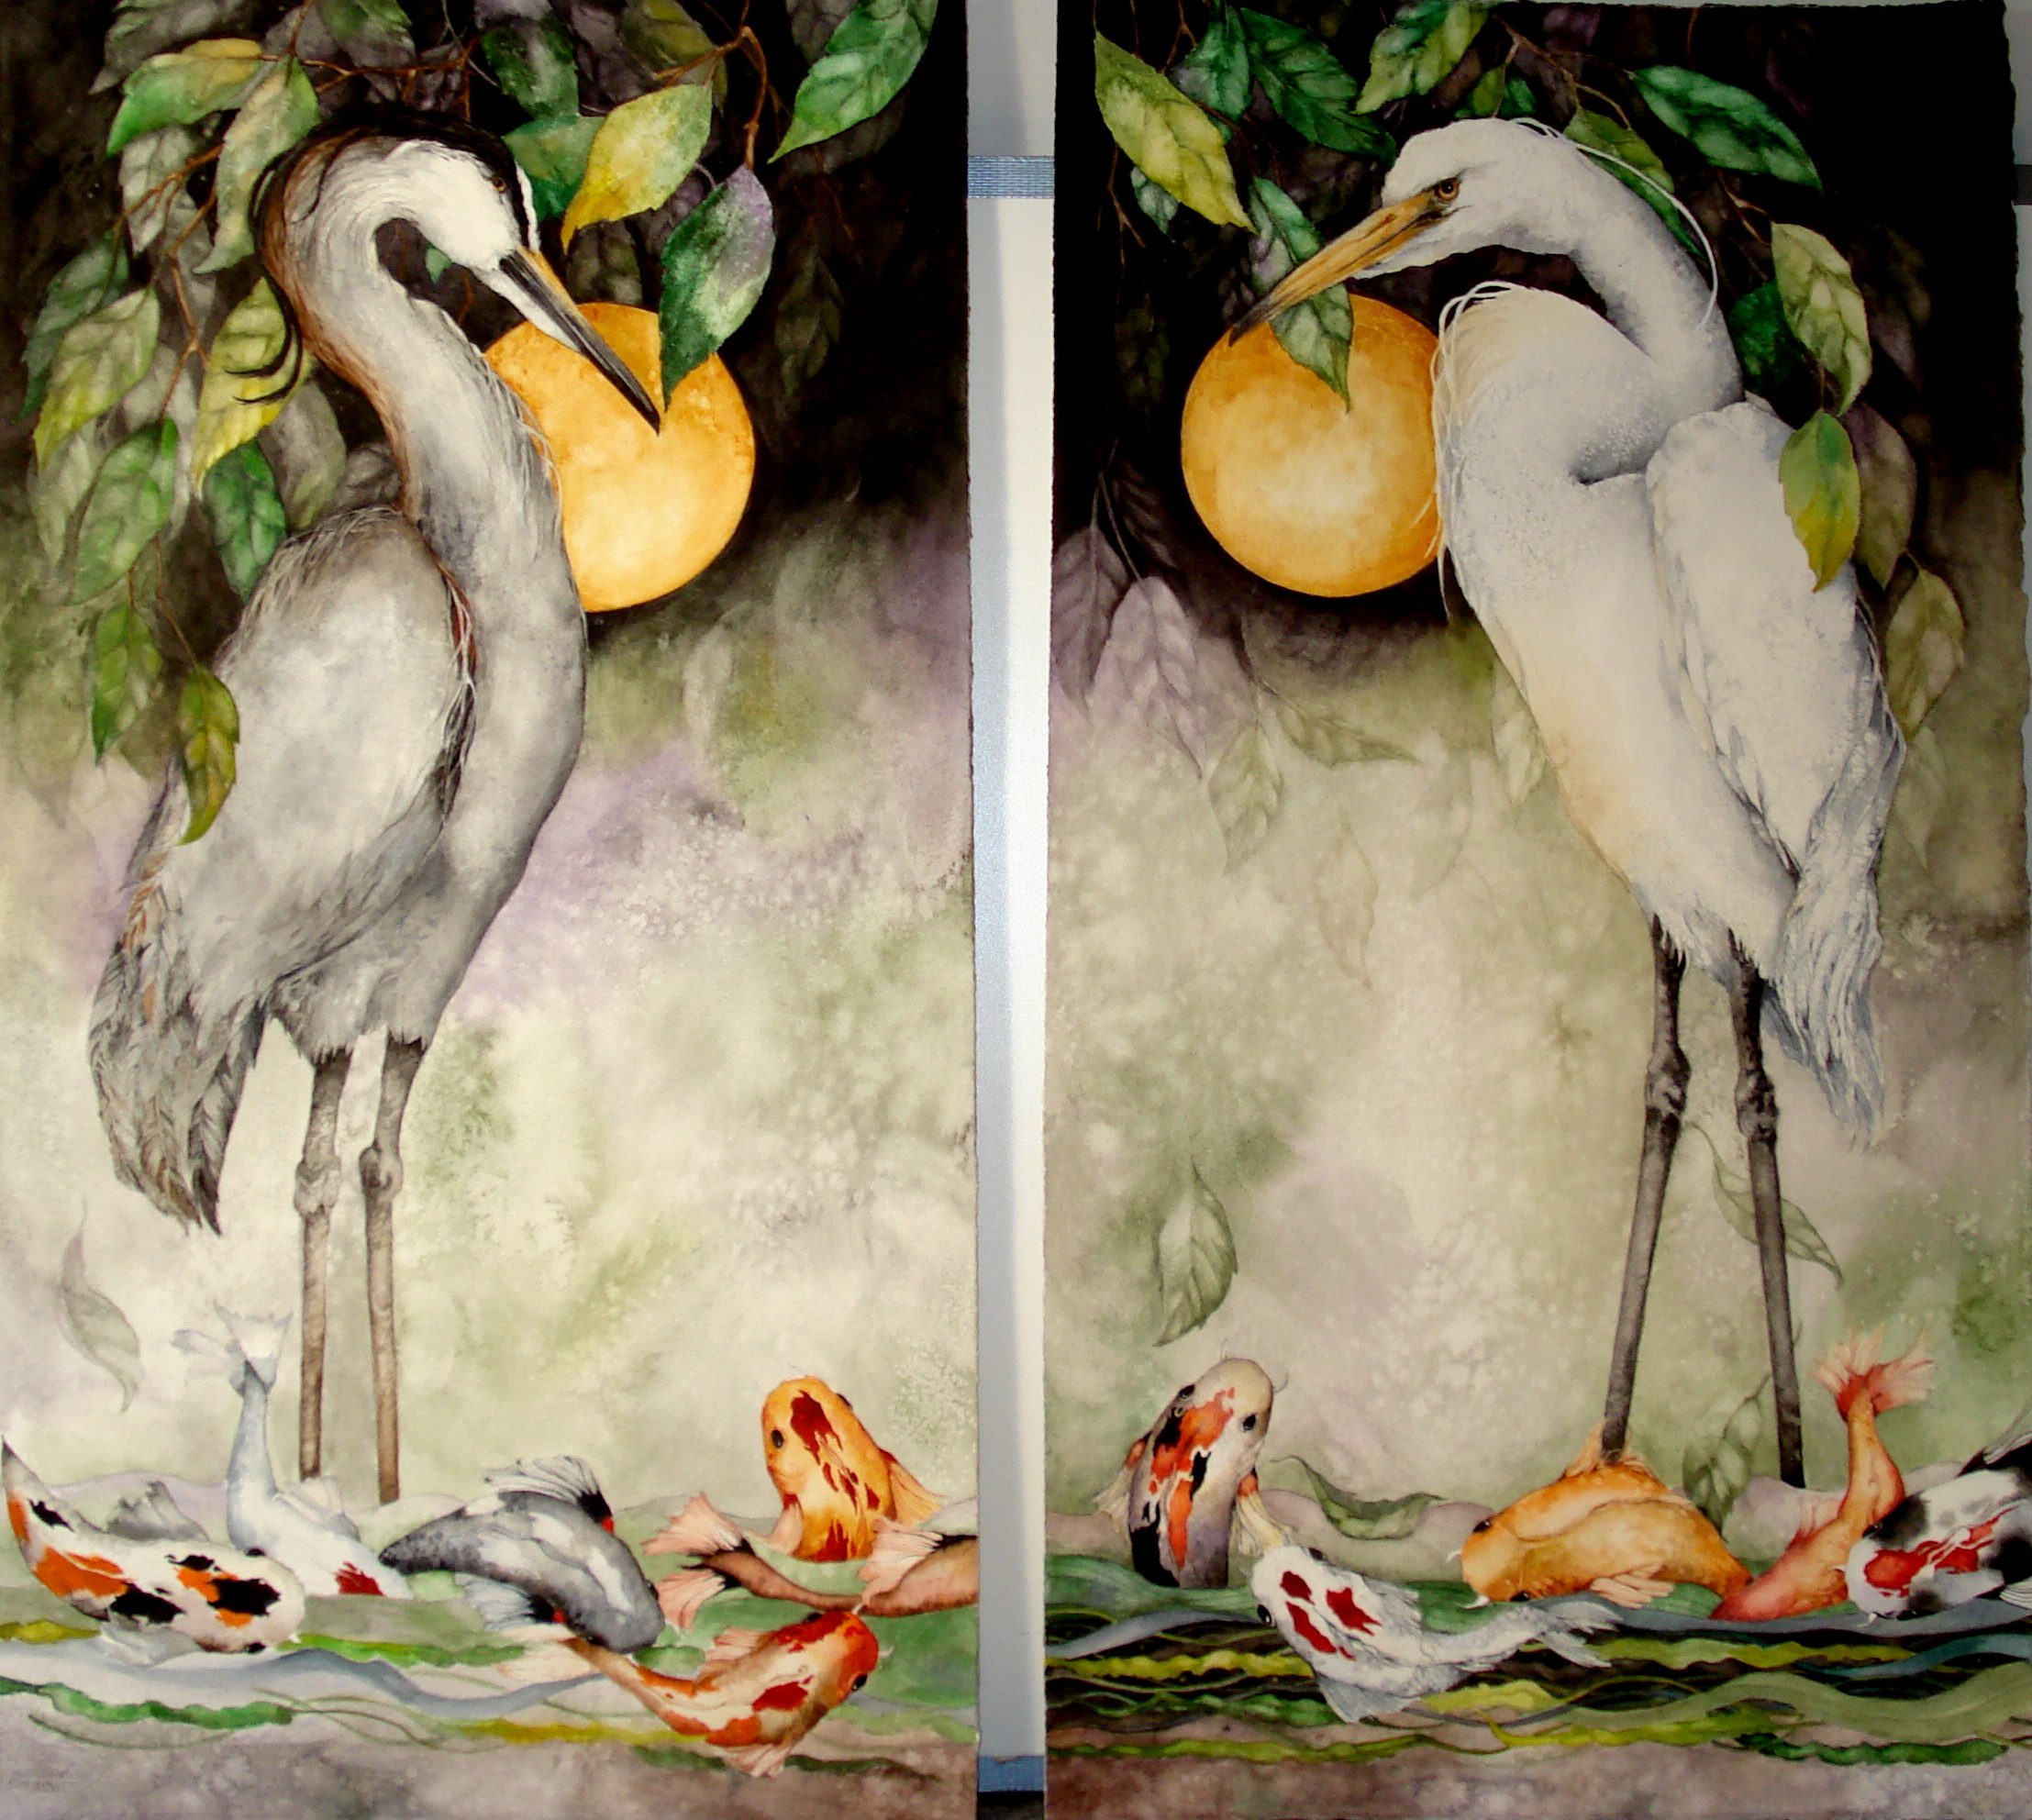
Stages of a Watercolor
These two original watercolors were painted together to maintain them as a pair for subject and colors
Where do you begin?…. is a question artists ask themselves all the time when facing a blank sheet of watercolor paper. I say, “at the beginning”; but it begins a lot earlier than that blank sheet of paper. The concept is developed after many sketches; the subject matter is selected, the basic background is decided in an abstract form, the design flow of the painting has to be thought out. When all these things come together in the primary drawings, the images are transferred to DeArches 100% rag, 300# sheets of watercolor paper.
I like to start the painting with the subject when a precise image is in the design, they are not completed but only begun. Moving around the paper and working different areas helps to solve any design or color issues that just cannot be solved in the original drawings. Working the color early into the design gives the paintings the flow and movement that the original idea required. But this is not a cut and dried option either, I find that when I work I am continually reacting to what is already on the paper, many changes in my central idea and design are all open to change. As I near the completion of the paintings, I begin to fine tune spots of color, values and brightness the paintings seem to ask me to do. Paintings can be born in hours, days or even weeks…….from the first concept to the final brushstroke……….the paintings themselves seem to say to me …ENOUGH!
The two paintings below are living happily ever after on the East Coast to this day…….beki killorin
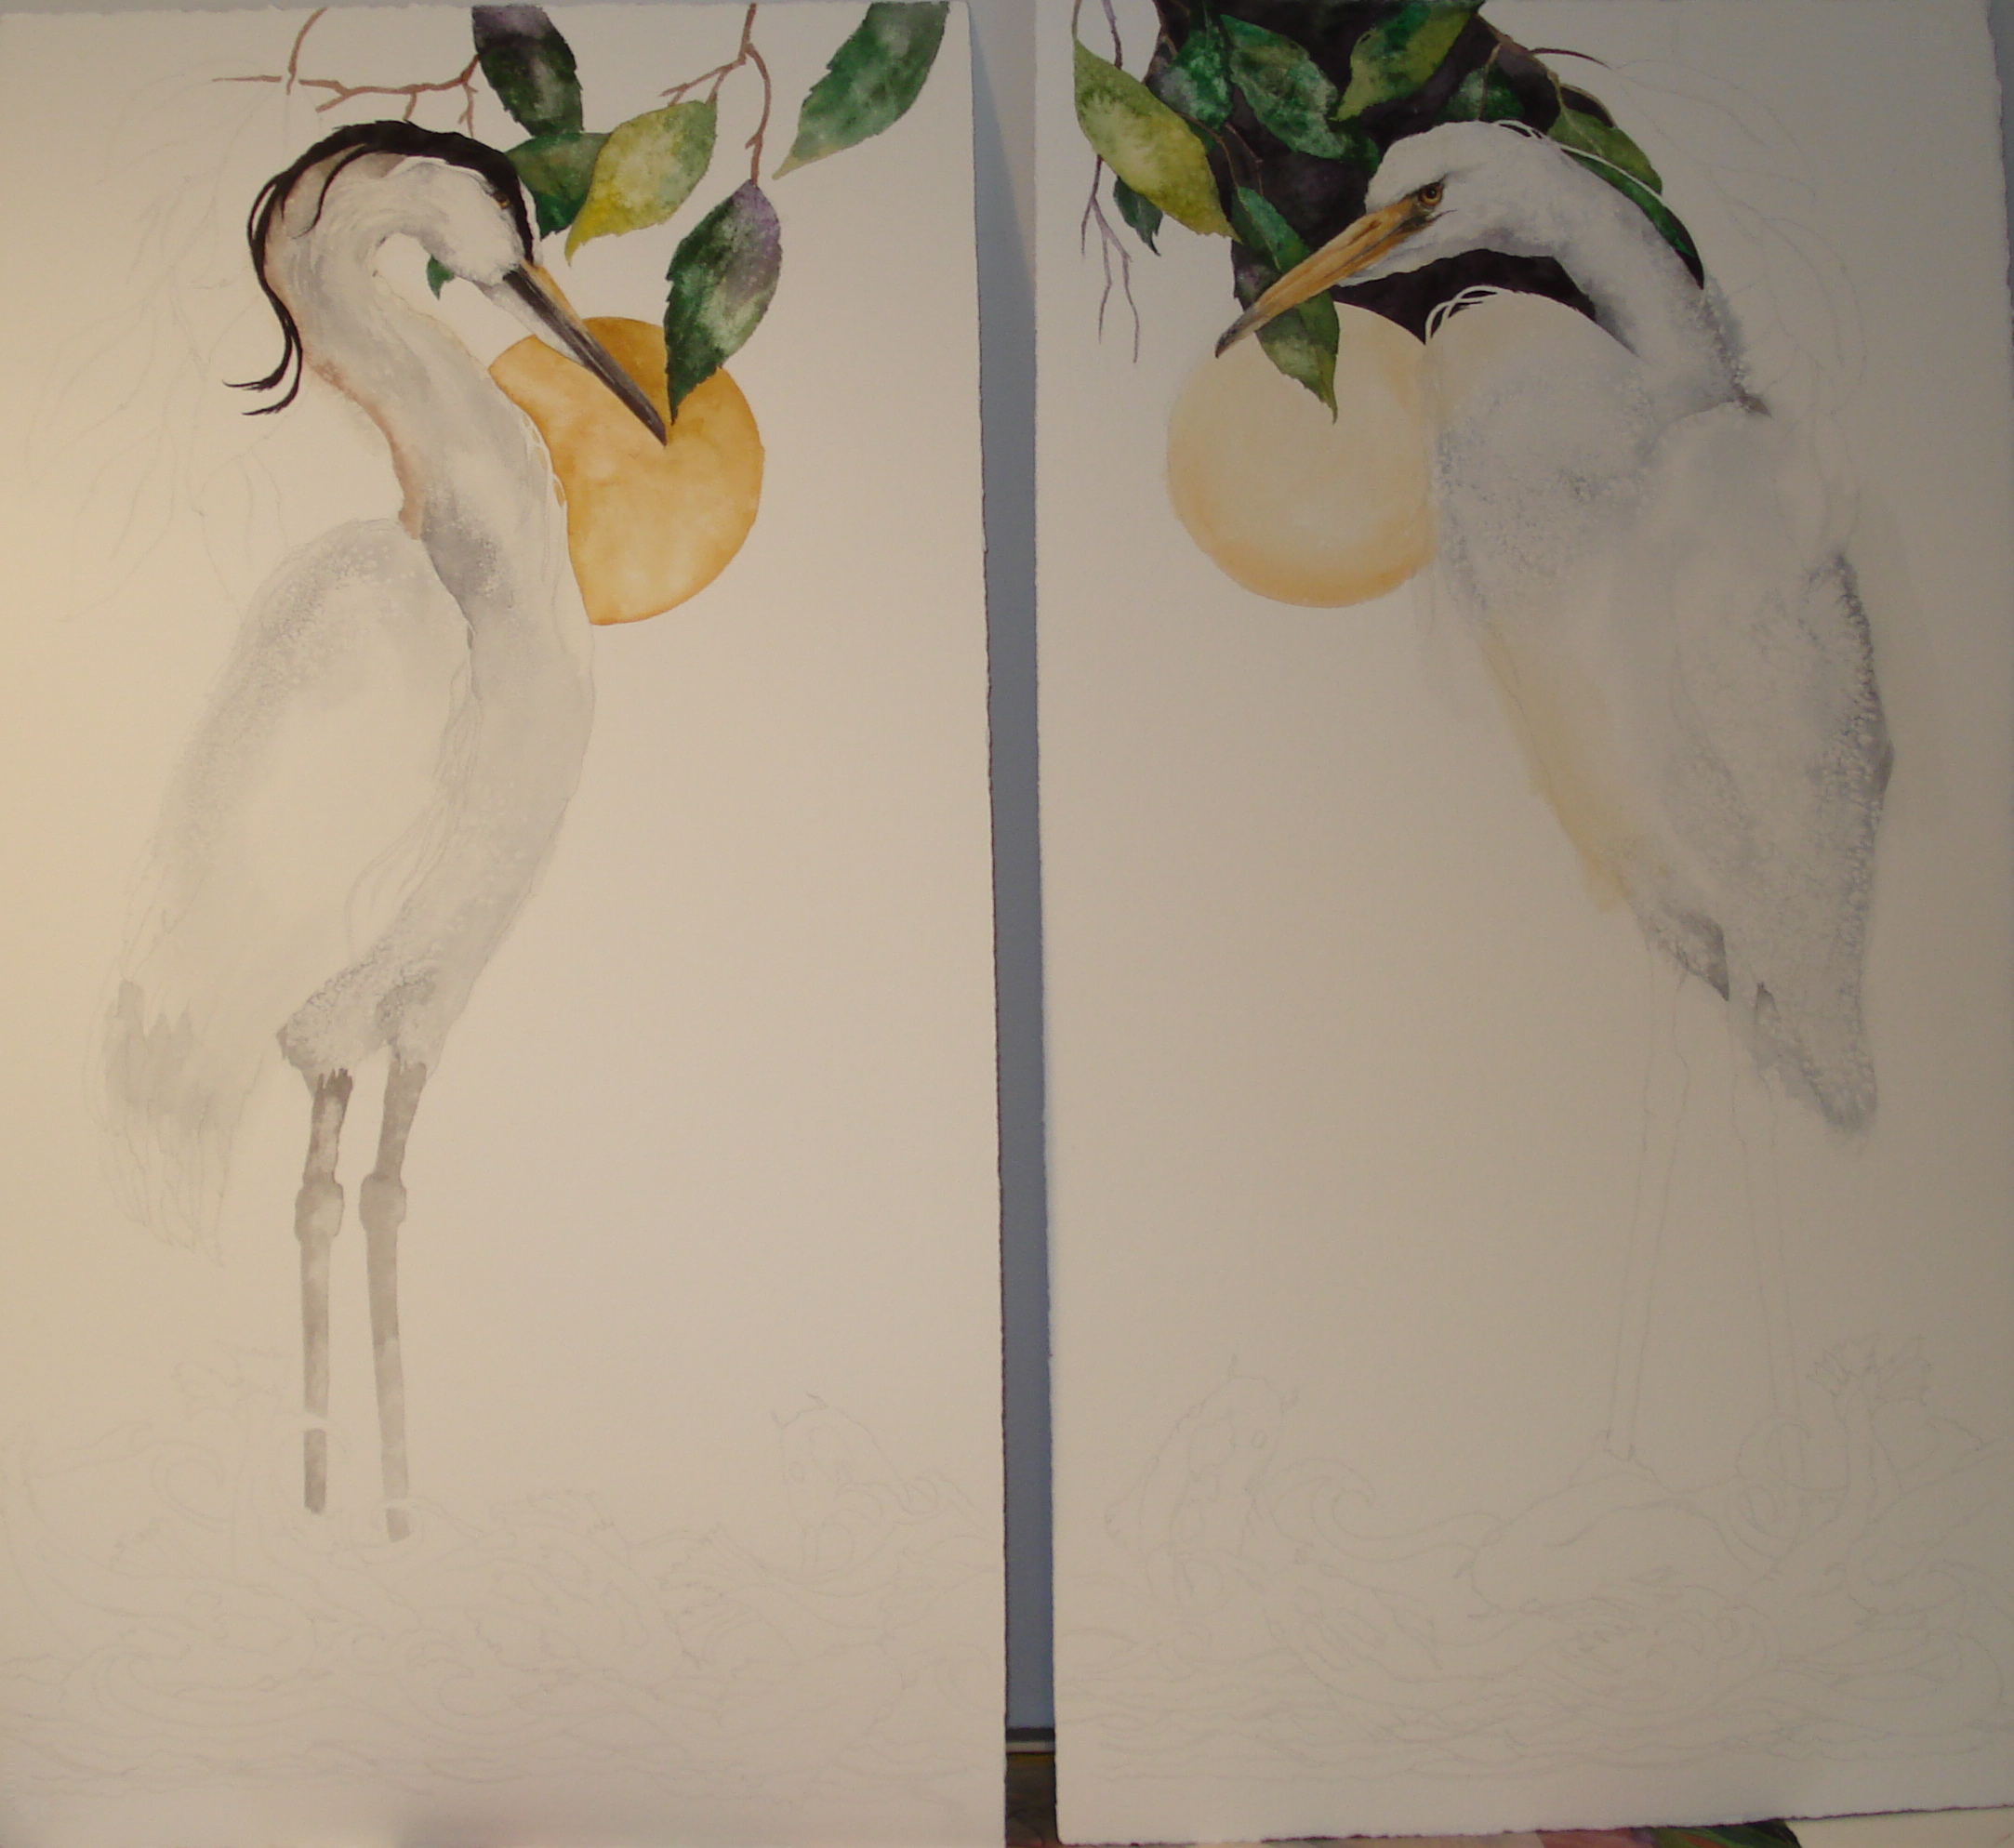
First washes on birds, beginning to think through the design of darks and lights
Background darks and lights resolving, more work on birds themselves and beginning to work into the foreground fish imagery
Adding more fish and connecting the two paintings in color and value
Almost finished
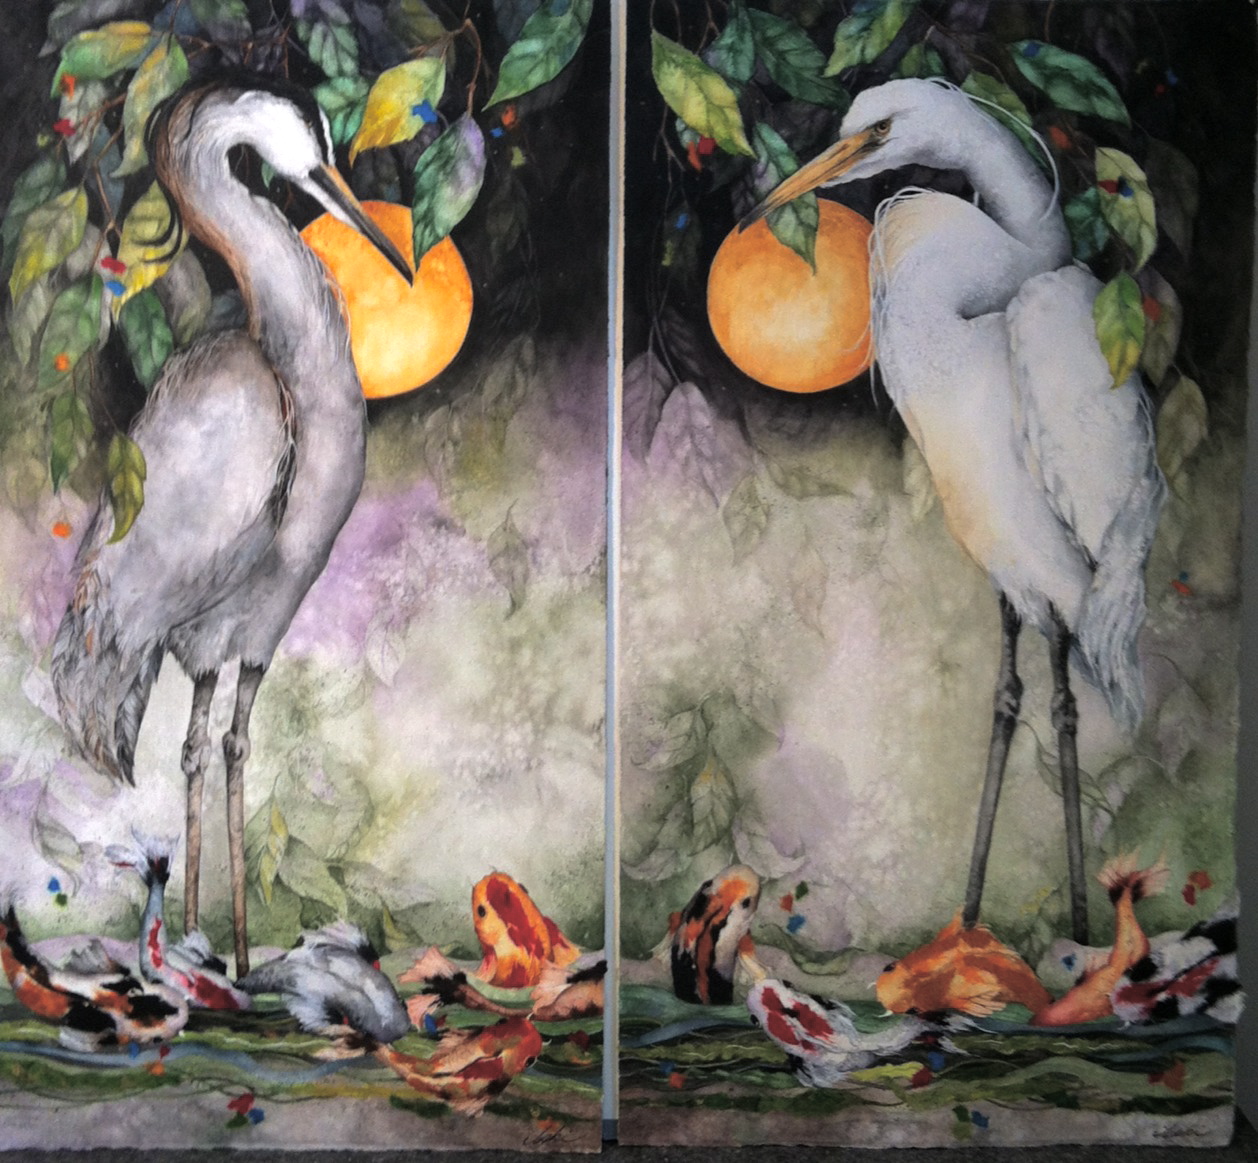
A few sprinkles of color spots with papers and the paintings are completed